


Hello everyone! 👋, this article is all about what I've learnt through my React JS journey and the BIG project I worked on to practice what I've learnt, it's been fun and tedious at the same time.
Introduction
I firstly, started with a course Complete Intro to React, v5 on Frontend Masters by Brian Holt which was hard to comprehend because I hadn't read most of the React concepts I guess. I had to stop the course then I moved to freecodecamp React section which explained a lot and made me understand what was going on in the previous course.
Being done with Free Code Camp React section, I then completed the course on Frontendmaster's which increased my grasp of some concepts like Component, State, Composing and so on.
Then I took two other courses by The Net Ninja which were YouTube playlists :
Here are a few things I've learnt so far:
I might not explain each term with its official meaning instead I'll explain based on my understanding of each term.
If you're not new to React and you just want to read about the project I worked on, click here
Component
A Component is what identifies a particular UI which you want to be displayed to the browser. It contains the state of the component, JSX (JavaScript XML) and also methods or functions.
Example:
import React from "react";

class App extends React.Component {
  state = {
    num: 1
  };

  increment = () => {
      this.setState({
        num: this.state.num + 1
      });
  };

  render() {
    return (
       <button onClick={() => this.increment()}>Increment {this.state.num}</button>
    );
  }
}

export default App;
There are two types of Components, which are:
The example above is a Class Component, which has a state and a method increment which is called every time the button is clicked. Meanwhile, the increment method updates the state of num in the object by one every time there's a click on the button.
State
State are data related to a particular component, which can be reusable and passed to several components.
Notice from the above example, there is a state having num: 1 which is shown in the button.
<button>Increment {this.state.num}</button>
Which is used by adding curly braces, which signifies that that's a Javascript expression, well in the case it to access what is the state num
Class Component
Class Component makes use of the keyword class obviously 😁, so it's more like an OOP - (Object Oriented Programming) concept. Notice there's a render() method that wraps the return statement, which is what is to be seen on the browser known as JSX.
import React from "react";

class App extends React.Component {
  state = {
    text: "hello"
  };

  addToText = () => {
    if (this.state.text === "hello") {
      this.setState({
        text: this.state.text + " everyone"
      });
    }
  };

  render() {
    return (
      <div>
        <p>{this.state.text}</p>
        <button onClick={() => this.addToText()}>Change Text</button>
      </div>
    );
  }
}

export default App;
The example above updates the state, if the state hasn't been changed yet, once the button is clicked.
Next off, let's look at a Functional component implementation of the same example above.
Functional Component or Stateless Component
Functional Component can't have a state, but it's possible with the help of a Hook method named useState. From the method useState(), the first variable out from the method in the initial value (in this case from the example below, variable text has the value "hello"), then the second variable is a Higher-order-function which updates the initial value (in this case, it's setText()).
Noticed the braces [ ] around the variable which means that useState() method is an array that has to be destructed before being used.
import React, {useState} from 'react';

const App = () => {

  const [text, setText] = useState("hello");

  const addToText = () => {
    if (text === "hello") {
      setText(text + " everyone")
    }
  }

   return (
      <div>
         <p>{text}</p>
        <button onClick={() => addToText()}>Change Text</button>
      </div>
  )
}

export default App;
From the above example, you'll notice it's really easier to write compared to Class Component so it's the current standard of writing React.
Note: the argument in
useState(...)could be any value, either a string, boolean, object, array and so on.
JSX - JavaScript XML
Before diving into what is JSX, firstly what's XML (eXtensible Markup Language).
XML is a markup language much like HTML and designed to store and transport data.
JSX is every statement in a return block, also notice {text} which makes JavaScript embedded directly into the <p> element.
 return (
      <div>
         <p>{text}</p>
        <button onClick={() => addToText()}>Change Text</button>
      </div>
  )
Note the return statement has parenthesis, indicating that the function is to return the statements which must be wrapped in a single element, in this case, the first
<div>.
Properties (props)
props are basically values passed to a
component.
From the example below, the <AccessingProps /> component is composed into the App Component and the passed a prop/property named value having the property text. Remember text
// First Component named App
import React, {useState} from 'react';
import AcessingProp from "./AccessingProp.js"

const App = () => {
   const [text] = useState("Hello");

   return (
     <div>
        <AccessingProp value={text} />
     </div>
   )
}

// Second Component named AccessingProp
const AccessingProp = (props) => {
  return (
    <div>{props.value}</div>
  )
}
There are so much more I've learnt but for the time being, I'll stop here and showcase the big project I took next after learning the basic of React.
Project
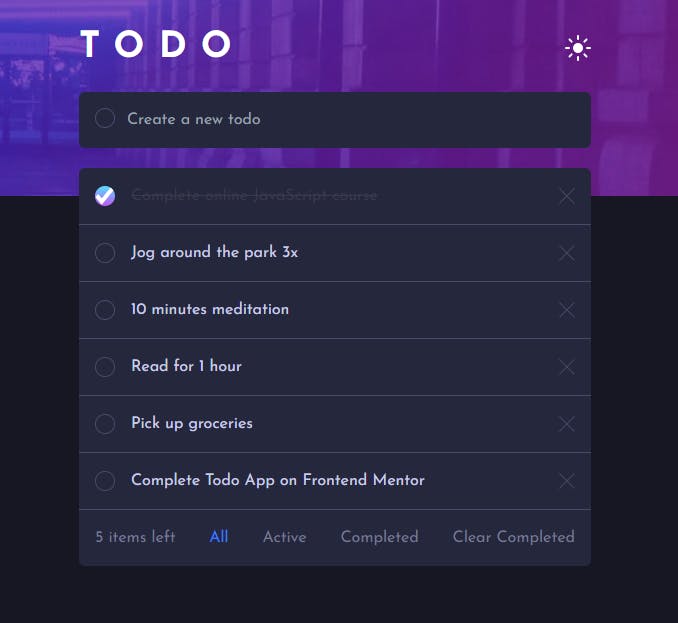
This big project is a Todo List App, I know right, it's not a really big project, but it was for me. I came across some difficulties where I had to ask for help and I got helped which made me learn faster and also how things should be done.
The challenge is from Frontend Mentors which is a great platform that offers both free and paid challenges to improve your skills.
So if you're reading this article and you're new to a programming language I'll suggest you ask for help when it's really needed, try it on your own, do some googling before asking someone.
I didn't want to style my components manually, so I used a template that included Tailwindcss and React created by Rutik Wankhade, here's the repo.
Before proceeding you could view the project and the code using the link below:
Demo: https://fm-todo-app.netlify.app/
Code: https://github.com/jomefavourite/React_Frontendmentor_Todo-app
Since it's a good practice to break down components into their atomic forms, I decided to structure my components into the simplest form I could think of. Each component handled only what the name of the component suggested.
Here's the structure I choice :
src
|__  components
|     |     Active.js
|     |     AddTodo.js
|     |     ClearCompleted.js
|     |     Completed.js
|     |     ItemsLeft.js
|     |     Nav.css
|     |     Nav.js
|     |     Todo.css
|     |     Todo.js
|__  design
|     |      *.jpg
|__  images
|     |      *.jpg
|
|      App.js
When I initially started the todo app project, I started off with the Class Component method of writing React, because that's what I knew as of that time.
Meanwhile, I heard how Functional Component with Hooks could do the same and even make me write less code, so I visited The Net Ninja YouTube channel where I watched this playlist React Context & Hooks Tutorial, which taught me all I needed to get started with Hooks.
If you'll like to see the Class Component method which I initially started with, you can visit the branch named
classWayin the repository here.
But I'm sure it's outdated because I've added a lot to the master branch recently. Two components had a state in my entire app, which areApp.jsandAddTodo.js.App.jshas a lot of functions that provide certain functionalities to all other components passed aspropsto other components.
But I've refactored the code to make use of React Context which now has all the state and functions.
Also, I made use of react-router-dom in this project to navigate between components. There's a component named Nav.js which does the navigating of components between "All" todo, "Active" and "Completed" components.

P.S. This is a recent update to the project.
I got a lot of feedback and someone said if only I could add localStorage functionality it'll be even awesome. So I went ahead, added localStorage functionality and also make use of React Context which has all the state and functions/methods used in the Todo app project.
I learnt about React Context from this series React Context & Hooks Tutorial.
Because of the new changes, the structure of the project changed now it looks like this.
src
|__  components
|     |     Active.js
|     |     AddTodo.js
|     |     ClearCompleted.js
|     |     Completed.js
|     |     ItemsLeft.js
|     |     Nav.css
|     |     Nav.js
|     |     Todo.css
|     |     Todo.js
|__  context
|     |     GlobalContext.js
|__  design
|     |      *.jpg
|__  images
|     |      *.jpg
|
|      App.js
If you'll like to view the recent changes:
Demo Todo App: https://fm-todo-app.netlify.app/
Code: https://github.com/jomefavourite/React_Frontendmentor_Todo-app
Conclusion
Learning React has been awesome and it is easy to implement some features than just using plain JavaScript as long as you've grasped the basic fundamentals of React.
While working on this, I've really learnt a lot about React so I felt like sharing my process. If you're also like to view my mini-projects learning React you can visit my codesandbox profile
Thanks for reading. Merry Christmas 🎄 and Happy New Year in Advance 🎉.