


Write CSS with Superpowers Using Sass.
Learn the fundamentals of Sass


Have you ever wished there was a faster way to write CSS (Cascading Style Sheet)? Or had 1000s of CSS code and found it difficult to maintain ?
Well, there is an Awesome tool I've been using called Sass (Syntactically Awesome Style Sheets) which gives you superpowers when writing CSS. Trust me, it's Awesome.
Table of Content
- What's Sass
- Clearing up the differences between "Sass" and "SCSS"
- Variables
- Nesting
- Parent Selector
- Extend / Inheritance
- Partials
- Modules
- Mixins
- How to get Sass running on Visual Studio Code
What's Sass : Syntactically Awesome Stylesheet Language
Sass is a preprocessor scripting language that is interpreted or compiled into Cascading Style Sheets.
From wikipedia :here)
Hmm, from the definition of Sass you might think it seems complex, but no it isn't really, well there will be some new syntax to get use to.
The reason why Sass interprets or compiles into Cascading Style Sheets (CSS) is because the Web browser only understands Cascading Style Sheets (CSS) and can't read/interprete Sass.
Now, lets look at the Awesome features Sass offers that doesn't exist yet with CSS :
- Variables, Nesting, Mixins, Inheritance, Partials, Modules, Operators and so on.
Clearing up the differences between "Sass" and "SCSS"
You might have probably heard of "SCSS" or not. Well, "SCSS" (Sassy CSS) uses block formatting like CSS. It uses curly braces to denote code blocks {...} and semicolons to separate rules within a code block .element { color: red; }. SCSS also support all valid CSS stylesheet rules unlike Sass. Also, ends with .scss extension.
Meanwhile, "Sass" doesn't make use of curly braces and semicolons but makes use of indentation when writing. Also called (The Indented Syntax) and ends with .sass extension.
Both "Sass" and "SCSS" syntax are referred to as Sass, since that's the general name, but the most popularly extension is "SCSS" (.scss).
For this article I'll stick to "SCSS' syntax of writing.
Here's an example to demonstrate my point
SCSS
main {
   h2 {
      color: #000;
   }
}
Sass
main
   h2
      color: #000
It's totally up to you to choice what style of writing you prefer, that being said lets look at the Features of Sass.
Variables
Think of variables as a way to store information that you want to reuse throughout your stylesheet. You can store colours, font name basically any CSS value you want to reuse.
I know! I know! Variables already exist in plain CSS but the method (symbol) of writing is different take a look below.
SCSS
$color: #000000;

p {
   color: $color;
}
CSS way of declaring variables and used
:root {
   --blackcolor: #000000;
}

p {
   color: var(--blackcolor);
}
SCSS supports the use of
:rootbut Sass doesn't cause not all CSS rules are valid in Sass.
Just looking at Sass way, isn't it much faster to write?
Nesting
This's one of my favourite feature from Sass, Sass allows you nest multiple CSS selectors just like HTML. But beware, overly nested rules (CSS selectors) could be hard to maintain later on and considered bad practice.
SCSS
nav {
    ul {
        margin: 0;
     }

     li {
          list-style-type: none;
     }

    a {
       text-decoration: line-through;
       color: #000;
    }
}
CSS
nav ul {
  margin: 0;
}

nav li {
  list-style-type: none;
}

nav a {
  text-decoration: line-through;
  color: #000;
}
With Sass, we don't have to repeat nav three times, since it's the parent Selector.
Parent Selector
Parent Selector helps to shorten a parent selector name (as the name suggest 🙃), when it's to be used. It uses a symbol & ampersand. You could also think of & as the current selector context.
The parent selector works beautifully with BEM naming.
Example
SCSS
.parent {
   margin-top: 2em;

   &__child1 {
      color: red;
   }

   &__child2 {
      color: blue;
   }
}
CSS
.parent {
  margin-top: 2em;
}

.parent__child1 {
  color: red;
}

.parent__child2 {
  color: blue;
}
Parent Selector also helps with reducing nested chains of Selectors.
If the SCSS file was written like this :
SCSS
.parent {
   margin-top: 2em;

   .parent__child1 {
      color: red;
   }

   .parent__child2 {
      color: blue;
   }
}
CSS
.parent {
  margin-top: 2em;
}

.parent .parent__child1 {
  color: red;
}

.parent .parent__child2 {
  color: blue;
}
From the CSS example above, you can see why the Reference Selector is important and doesn't cause over nested chains but it's all up to you though.
Extend / Inheritance
Here's another awesome feature that makes use of % then a name assigned.
%extendPropertyName
It basically allows sharing set of CSS properties to multiple selectors making your Sass stylesheet DRY (Don't Repeat Yourself) as much as possible. You could also think of it as a placeholder.
In order to call or use a declared extended placeholder, you have to use the @extend rule.
Example
SCSS
%btn {
  padding: 0.5em 1em;
  border: 2ps solid black;
  text-transform: uppercase;

  &:hover {
    background: #000;
    color: #fff;
  }
}

.primaryBtn {
  @extend %btn;
  background: green;
}

.secondBtn {
  @extend %btn;
  background: blue;
}
CSS
.primaryBtn, .secondBtn {
  padding: 0.5em 1em;
  border: 2ps solid black;
  text-transform: uppercase;
}

.primaryBtn:hover, .secondBtn:hover {
  background: #000;
  color: #fff;
}

.primaryBtn {
  background: green;
}

.secondBtn {
  background: blue;
}
Partials
Here's another cool feature of Sass and it really brings maintenance to the table of using Sass.
Just like you would create an about.html page on your website, linked to the default page index.html, you could also do something similar with Sass.
In this case, the Sass file you want to be linked or imported to your main Sass file begins with _ (as in _filename.scss) and are not compiled until it's imported to the main stylesheet style.scss (which doesn't include the hyphen).
Example is at the Modules Section.
Modules
This is when you have multiple partials (_filename.scss)'s and you want to bring them together into a single Sass file (style.scss) for it to be compiled into a CSS stylesheet.
You might wonder, why break my files into parts (partials)?
It's a good practice because it will be easier to maintain and navigate, instead of scrolling all the way up to look for a selector then scroll down to continue coding you could just navigate through different partials.
If there an error in a partial file, Sass compiler or interpreter tells you there an error so, it easier to debug.
Also, the main Sass file (style.scss) will have access to the variables, mixins, functions declared in the partial (_filename.scss) file when imported to the main Sass file (style.scss).
Hope this explains my point to your understanding, if not there is a link to a video that breaks down these point further.
In other to import into the main Sass file style.scss the @import rule is used.
Example :
SCSS
// _base.scss file
$color-red: red;

.container {
  width: 90%;
  max-width: 1200px;
  margin: 0 auto;
}
SCSS
// style.scss (main scss file)

@import "base';

h1 {
   color: $color-red;
}
CSS
.container {
  width: 90%;
  max-width: 1200px;
  margin: 0 auto;
}

h1 {
  color: red;
}
Note : When Sass imports a file, that file is evaluated as though its contents appeared directly in place of the
@import. Any mixins and variables from the imported file are made available, and all its CSS is included at the exact point where the@importwas written. What’s more, any mixins, functions, or variables that were defined before the@import(including from other@imports) are available in the imported stylesheet.
Mixins
Mixin are like functions in and programming language but without returning anything. It allows grouping of CSS declarations which can be reused when called also it takes in values, just like a function.
Have you ever wished there were a way to speed up creating a pseudo element, without retyping shared styles? You could speed up the process this way
SCSS
@mixin psedo($pos, $top, $right, $bottom, $left) {
  content: "";
  display: block;
  position: $pos;
  top: $top;
  right: $right;
  bottom: $bottom;
  left: $left;
}

.selector {
  @include psedo(absolute, null, null, 20px, 40px);
}

// null simply means don't add in this case (be empty) and it doesn't show in the CSS stylesheet
CSS
.selector {
  content: "";
  display: block;
  position: absolute;
  bottom: 20px;
  left: 40px;
}
Hope you're excited seeing the features above, there a lot more features that I won't cover but with the ones above, it should get you started Sass.
Here's an embedded Sass code you could play with, nothing fancy.
How to get Sass running on Visual Studio Code
- Make sure you have Visual Studio Code installed already, if not click here
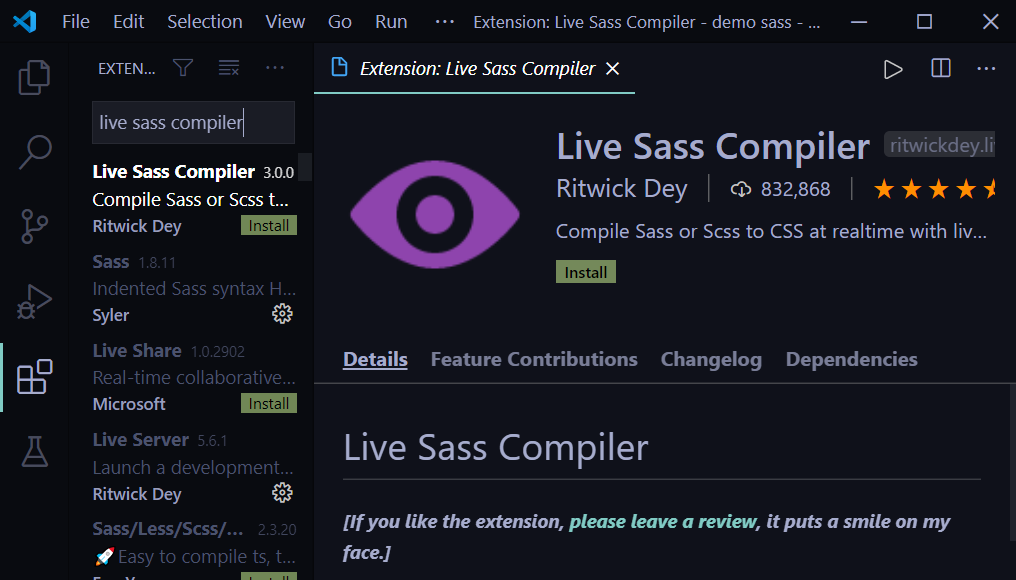
- Click on the Extension Panel or (Ctrl + Shift + X)
- In the search bar, type in Live Sass Compiler then install it.
- Reload Visual Studio Code to get everything setup
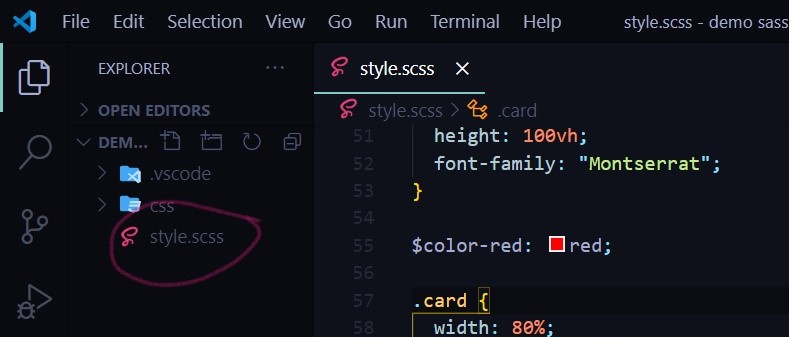
- Create a style.scss file (if you prefer .sass, follow the same process)
- To compile your Sass file to CSS, click on Watch Sass on the Status Bar

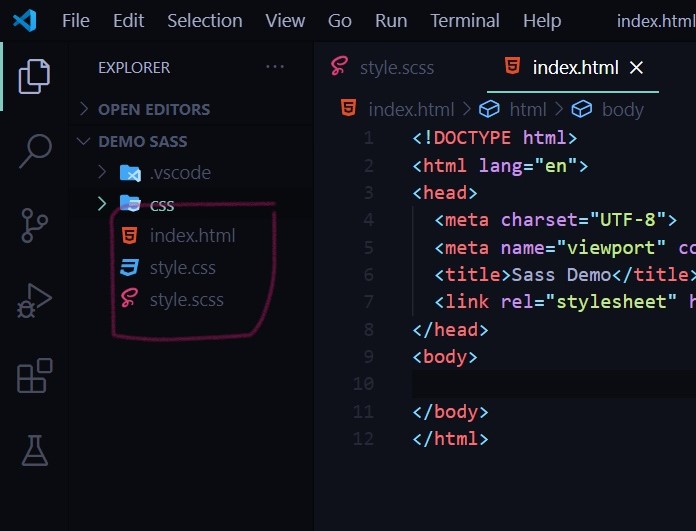
Doing this will create a style.css file that can be linked to the index.html file. Note: Don't make changes to the style.css file cause it will get overwritten each time you save the style.scss file.
- Create an index.html file
- Link to the compiled style.css
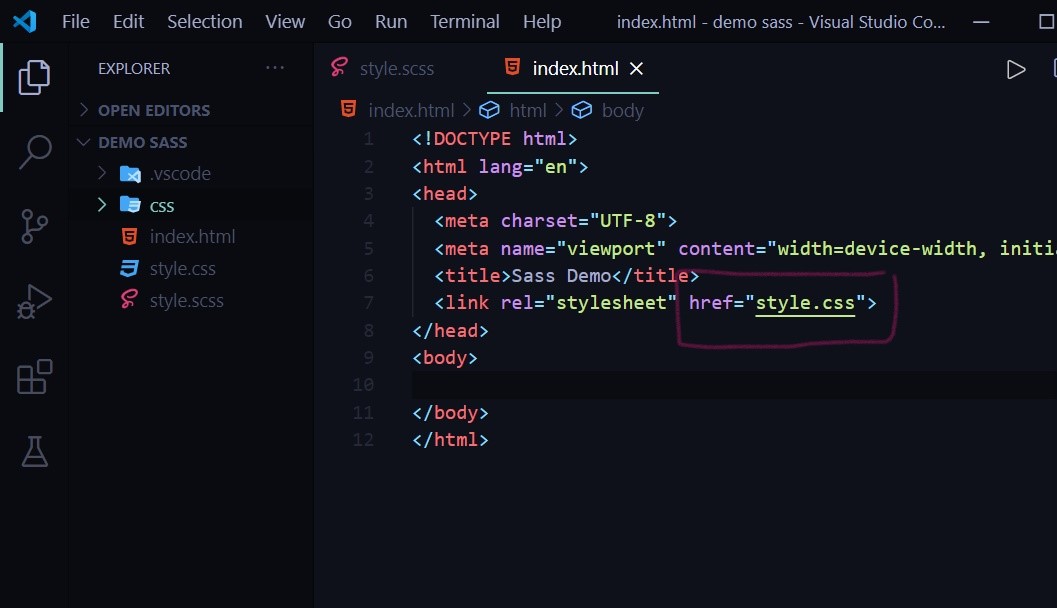
Voila!, that's all you need to do to get Sass up and running.
For more details on Sass check out this video by Brad Traversy
By the way, If you're wondering why I didn't continue my series on Javascript: The Hard Parts, I just felt I should take a break from writing about JS and write about something else 😉.
Thanks for Reading
If you'd like to contact me I'm active on Twitter. Bye for now, see you later.